In this blog, I am going to show you detailed procedure to connect to ESP32 based modules to Wi-Fi via BLE. In home automation systems, IoT module needs to be connected to Wi-Fi to send/receive wireless messages. Provisioning the module Wi-Fi via Bluetooth is one of the most widely used methods.
Wi-Fi provisioning through Bluetooth is one of the widely used and sophisticated methods to achieve wi-fi provisioning.
What is Wi-Fi provisioning?
Provisioning means helping the IoT module to connect to a specific Wi-Fi network. Usually, any Wi-Fi network can be connected to by accessing it’s SSID and password. These are also called wi-fi credentials
In Provisioning via BLE, the wi-fi credentials are transported to the IoT module via Bluetooth. IoT module will then connects to Wi-Fi using these credentials.
In most of the cases, manufacturer provides a mobile app support for provisioning. For ESP32, ESP BLE Prov app is available both in apple and android. This App can be used to test and build your application.
Esp32 Mobile app is open source, thus you can also use it as a base to develop your own mobile app.
Tools needed for ESP32 Wi-Fi provisioning via BLE
To enable WIFI provisioning via Bluetooth, we would need to download esp-idf. Download the ESP-IDF tools installer https://dl.espressif.com/dl/esp-idf-tools-setup-2.3.exe
This installer has everything you need for a working esp-idf tool. This tool installs Python, Github, Cmake, NInja and other compiler tools. If you have any of those already installed, I recommend uninstalling them. Any minor mismatch in the version number or duplicate directories makes it likely installation to fail with an exit code 1.
Since all the tools are installed by one installer, you can keep your system clean from any duplicates.
STEP 1: Download the Installer

Double click on the .exe file. An installer will open and go through the installation process. I am not going through the whole installation process, it is pretty basic. Most of the times you just need to click to next and then finish at the end.
Installation process takes about 10 – 15 minutes depending on your internet speed.
STEP 2: Open ESP-IDF command prompt
When the installation is done ESP-IDF command prompt is automatically opened. If not, you can search for it in the search bar and open.
ESP-IDF tools path is also automatically added.

STEP 3: Locate for esp-idf folder
Look for esp-idf folder. It will usually be on the desktop or in the one of the installation folders.

Navigate to esp-idf -> examples -> Provisioning -> ble_prov folder.
STEP 4: Copy project to a new folder
Copy the ble_prov folder to another folder on the desktop or your desired location. Here, I have created “esp” folder.
STEP 5: Open esp-idf command prompt
Open esp-idf command prompt. Navigate to your new folder where you have moved the ble_prov project. Here, it is in “esp” folder.
Navigate to the ble_prov folder in the esp-idf command prompt
STEP 6: Set the target
Type idf.py set-target esp32
C:\Users\User\Desktop\esp\ble_prov>idf.py set-target esp32
Click enter, you will see bunch of lines running though. At the end, you will see the below snippet.

STEP 7: Build the code
Type idf.py build
C:\Users\User\Desktop\esp\ble_prov>idf.py build
Click enter and the project files will now build.
STEP 8: Flash the code to esp32
Type idf.py -p COMx flash
C:\Users\User\Desktop\esp\ble_prov>idf.py -p COM8 flash
Click enter, if it says Connecting. . . . . . ______ . . . . . . _______ . . . . . . ______ . . . . . . _______
Press and hold the reset button for a second and you should now see the code is flashing to the ESP32.
You will see something like this at the end of process.

ESP32 module is now flashed with the provisioning code. If you wish to look at the log messages, type the below command.
Type idf.py monitor, to see the messages on the console.
C:\Users\User\Desktop\esp\ble_prov>idf.py monitor
You can now see all the status messages from the ESP32.
STEP 9: Open the ESP BLE Prov mobile app
Now open the mobile app, ESP BLE prov. Enable bluetooth.
If you have the QR code scan it, or click “I don’t have a QR code”
Connect to your ESP module
All your BLE devices are listed. Search for your ESP32 module and click on it to connect.
Enter your Wi-Fi SSID and Password
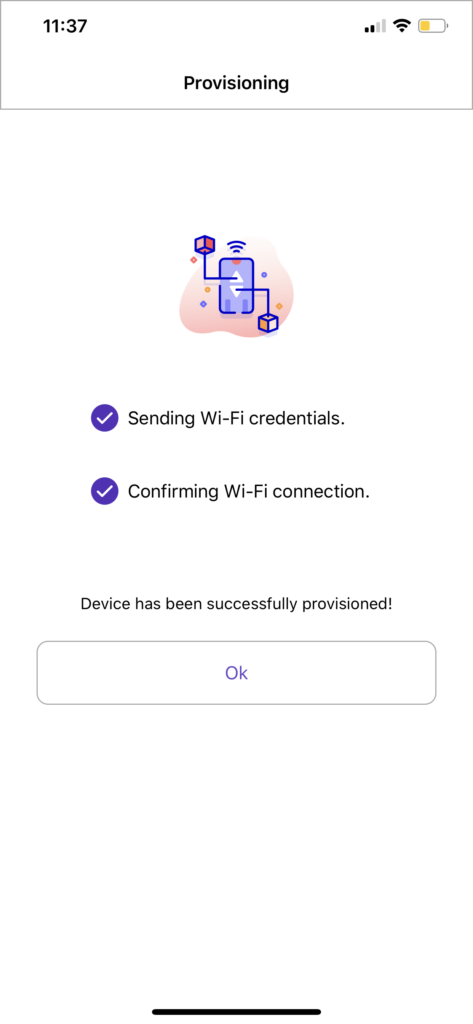
It will ask for wi-fi credentials. Enter the SSID and password, you should see a message like this and your devices is successfully provisioned now.

Leave your comments below if you had any issues or if you were able to successfully provision your device!

